Please ensure that your modem/router is connected to your telephone line by a telephone cable and your computer is connected to your modem/router with a LAN cable. The difference between a telephone cable and a LAN cable can be seen here. Also, you need to connect your router to it's power supply and it's power supply to a free two-prong socket.
You will need to have a working network card or port with a computer attached in order to connect to the ADSL router. These instructions assume the default router setup, if they do not work, contact us. This guide assumes that you have set up all the physical conections as per the welcome note, found inside the router's box.
You should now see an interface that shows Advanced Setup, third menu item from the top left.
Click on Advanced Setup.
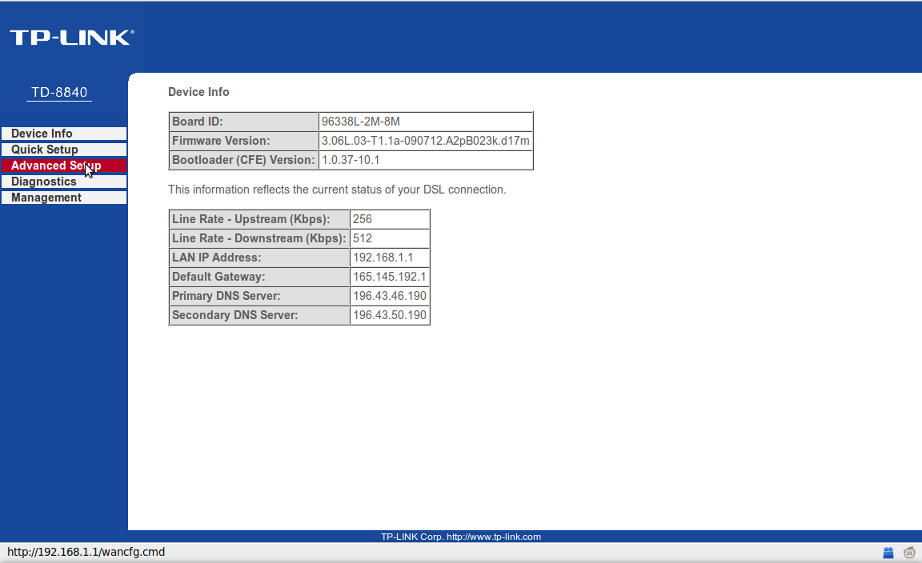
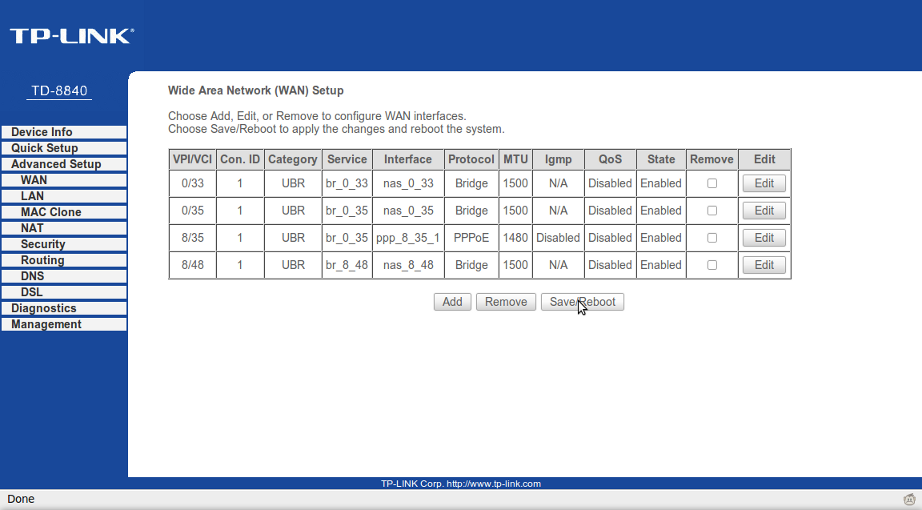
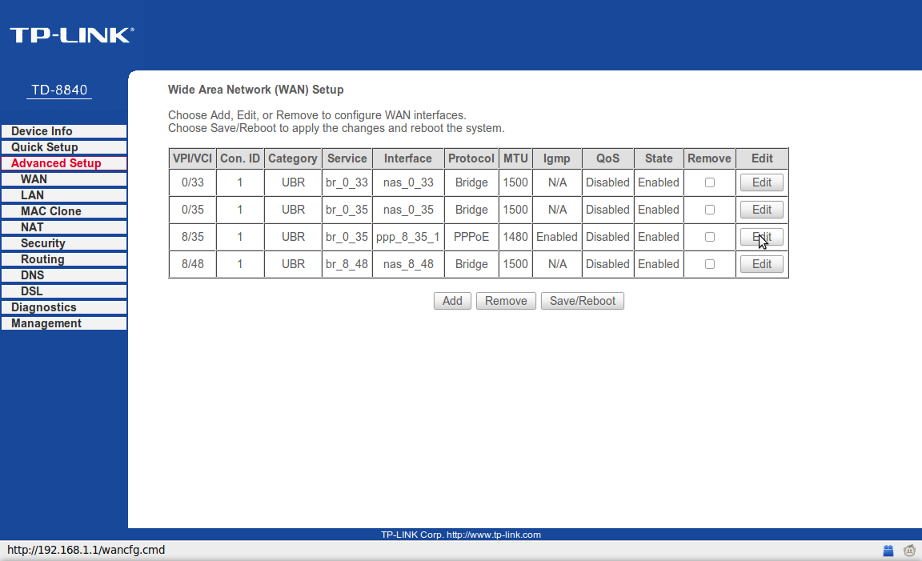
This is the default page that is displayed once Advanced Setup is clicked.
Click on the Edit button on the third line down from the top in the table.
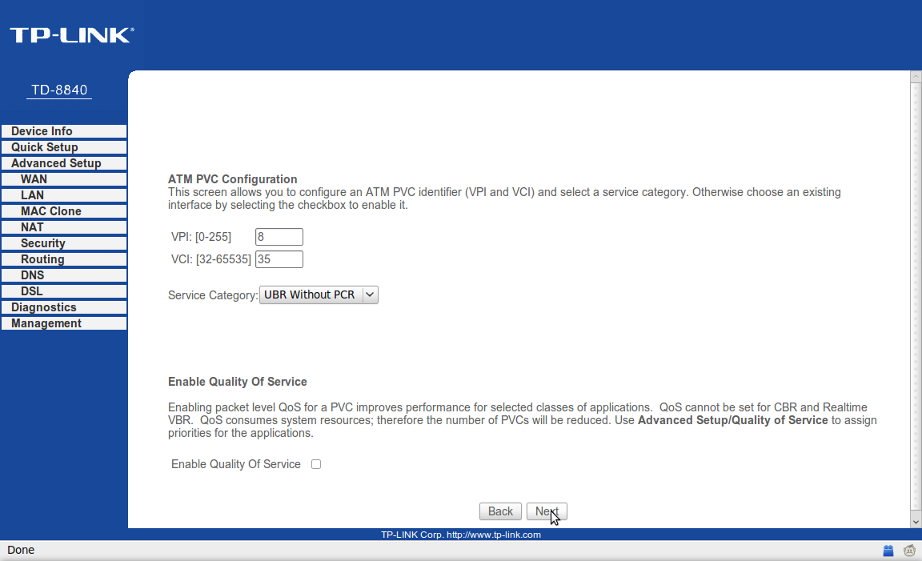
Make sure that the VPI is 8 and the VCI is 35.
Service Category is UBR Without PCR.
As default Enable Quality of Service is off.
Click on the Next button to proceed.
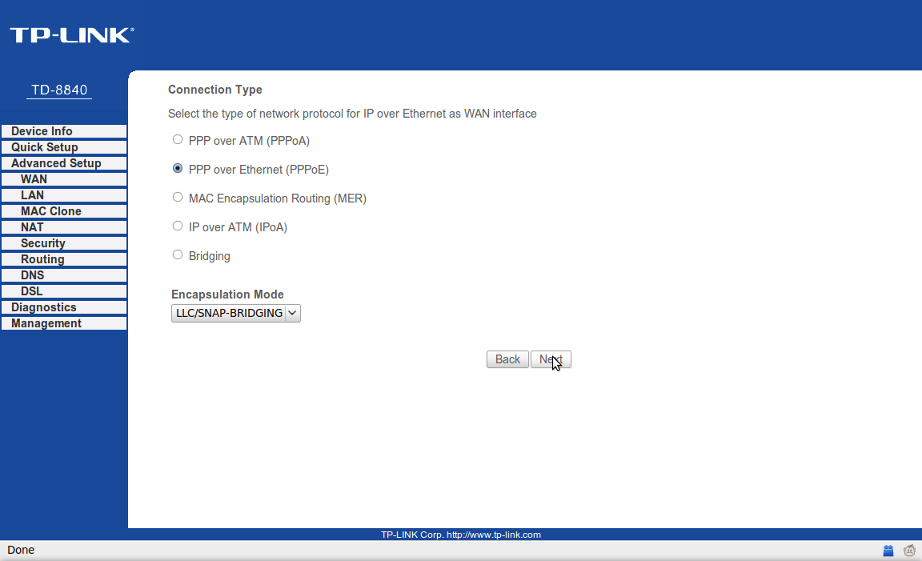
Under Connection Type select PPP over Ethernet (PPPoE).
Under Encapsulation Mode, LLC/Snap-Bridgingis selected by default.
Click on the Next button.
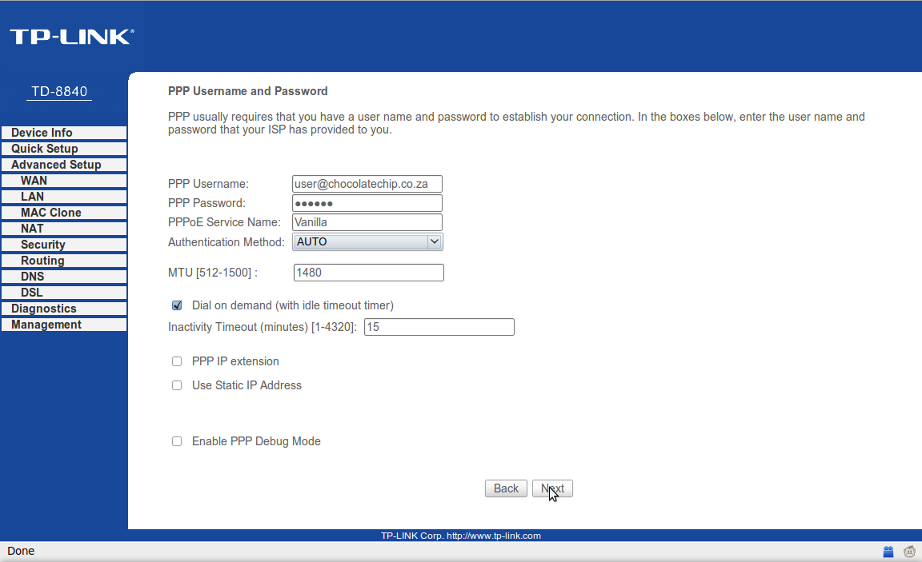
Please enter in your username and password supplied by Vanilla.
Next to PPPoE Service Name please enter in Vanilla.
Leave all other settings as default and click on the Next button.
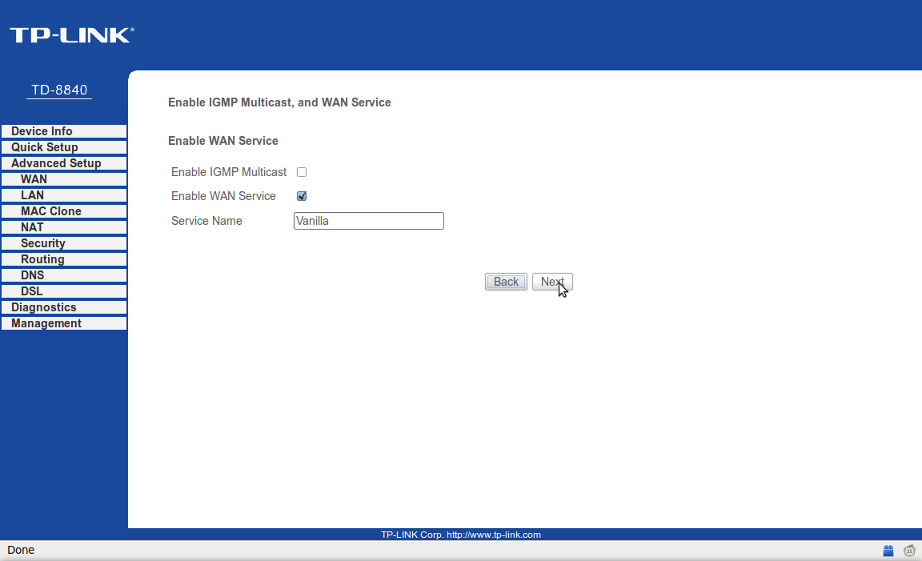
Change the Service Name to Vanilla.
Leave all other settings as default and click on the Next button.
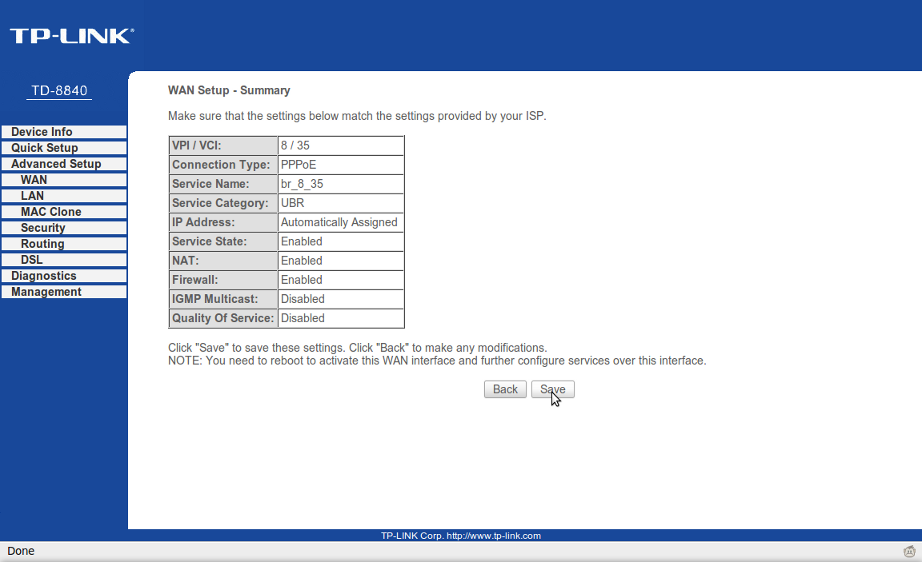
This is a summary page of the settings that have been applied.
Click on the Save button to make the changes take affect.
The setup is now complete, please click on Save/Reboot for the settings to be saved to the router.
Allow up to 5min for the settings to be saved, the router to reboot and to connect to Vanilla. Once this is done you can navigate off the setup page.